
Bunny Purse
This will make everybunny smile!
I love bunnies all year around but when it comes to Easter it definitely reaches another level. So about one week before Easter I got the idea to crochet this adorable bunny purse.
This pattern is for private use only. You are not allowed to sell this pattern or items made by using it.


Material
The bunny purse made by using the materials listed below is about 14 cm long measured from under cord to bottom without the feet and has got a width of 10 cm measured without the arms. From ear top to toe it’s 23 cm and from one arms end to the other it’s 14.5 cm. All measured without stretching the purse.
- Yarn in aran weight. I‘ve been using myboshi Original No. 2 (Amazon link) in pink color »Himbeere« (now it’s »Rouge«) for the bunny and the twisted cord. For the eyes, nose, tail and stitchings on the ears and belly I’ve been using Schachenmayr Catania Grande (Amazon link) in White. The cheeks are made using Woll Butt Lisa in red color »Rot«. The pupils are made of scrap yarn in Anthracite.
- Hook 4.5 mm
- Stitch marker as for some parts you are working in continuous rounds
- Yarn needle for weaving in ends and assembly
- 2 small beads like this (Amazon link) for each end of the twisted cord
- Pompom maker like this (Amazon link) or some cardboard or a fork if you don’t own one
Stitch Chart
| ch | chain |
| st | stitch |
| sl st | slip stitch |
| sc | single crochet |
| sc2tog | single crochet two together = decrease [dec] |
| hdc | half double crochet |
| dc | double crochet |
| Hhdc | Herringbone half double crochet (tutorial) |
| rep | repeat |
| inc | increase = crochet 2 stitches in 1 stitch |
| dec | decrease = crochet 2 stitches together |
Body (Pink)
Start: ch 17
Round 1: sc 2 in 2nd ch from hook, sc in next 14 ch, sc 2 in last ch, keep on working along opposite side, sc 14 (32)
Round 2-3: sc evenly (32)
Round 4-16: Hhdc in each st around (32)
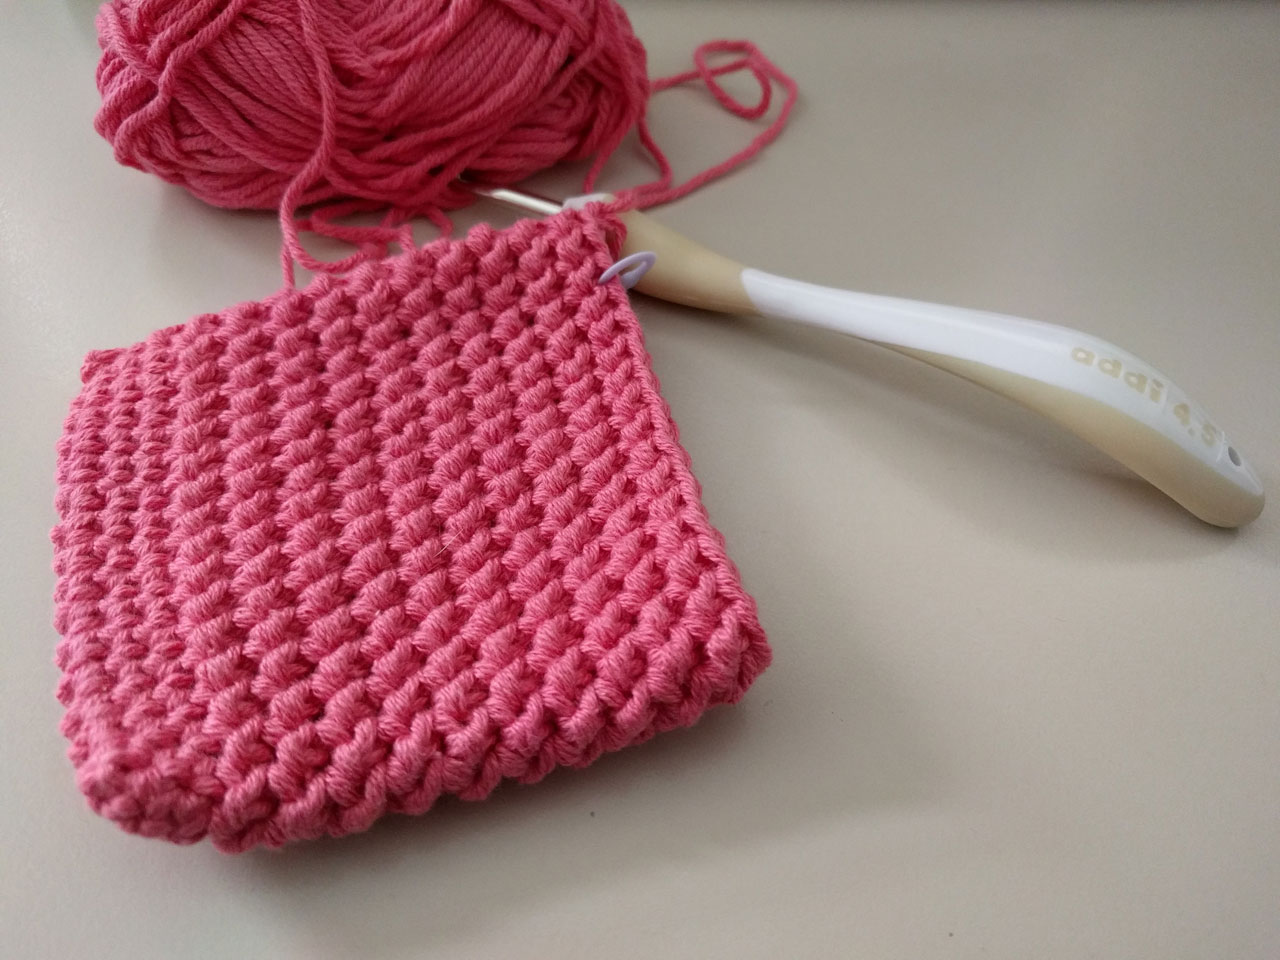
The herringbone hdc makes a lovely stitch pattern
Round 17: sc evenly (32)
Round 18: sl st in next st, ch 1, sc in next st, *ch 2, skip 2 st* rep around, sl st to 1st st made (11 ch 2 spaces made)
Round 19: ch 1, sc in each st and sc 2 in each ch 2 space, join with a sl st (32)
Round 20: sc evenly, sl st, fasten off and weave in loose ends
Twisted cord (Pink)
You will need a large amount of yarn to make a twisted cord. I didn’t measure my strand, I’m sorry for that. As you can shorten it later, be a bit generous with the amount of yarn as it will amazingly shrink while doing the twisted cord steps as shown in this YouTube video by Eunny Yang:
I put the loop around a door knob and stepped away from it until the yarn was slightly taut and then twisted it. Pull the cord through the spaces of your bag and place the beads at each end before securing them with knots.
Arms 2x (Pink)
Start: sc 4 in magic ring
Round 1: [inc] work 2 sc in each st (8)
Round 2: sc evenly (8)
Round 3: [dec] sc2tog, sc 6 (7)
Round 4: sc evenly, sl st to 1st st made and fasten off, leaving a long tail for sewing
Sew the arms to the body using the loose ends and your yarn needle. Weave in ends.
Feet 2x (Pink)
Start: sc 4 in magic ring
Round 1: [inc] work 2 sc in each st (8)
Round 2-3: sc evenly (8)
Round 4: sc evenly, sl st to 1st st made and fasten off, leaving a long tail for sewing
Sew the feet to the body using the loose ends and your yarn needle. Weave in ends.
Ears 2x (Pink)
Start: sc 4 in magic ring
Round 1: [inc] work 2 sc in each st (8)
Round 2-3: sc evenly (8)
Round 4: [inc] sc 2 in 1st st, sc 3, sc 2 in next st, sc 3 (10)
Round 5-6: sc evenly (10)
Round 7: [dec] sc2tog, sc 3, sc2tog, sc 3 (8)
Round 8: sc evenly (8)
Round 9: [dec] sc2tog, sc 2, sc2tog, sc 2 (6)
Round 10: sc evenly (6)
Round 11: sc evenly, join with a sl st. Fasten off, leaving a long tail for sewing.
Sew the ears inside the front (face) side of the top of your purse and weave in ends.
Eyes 2x (White)
Start: sc 4 in magic ring
Round 1: [inc] work 2 sc in each st (8), join with a sl st. Fasten off, leaving a long tail for sewing.
Do stitch on the pupils before sewing the eyes to the body using your yarn needle. Weave in all ends.
Nose (White)
Work all stitches into a magic ring:
ch 1, hdc, dc, hdc, sc, hdc, ch 1, hdc, sc, hdc, dc, sc, sl st
Pull tight to close the ring and fasten off, leaving a long tail for sewing. Sew the nose to the body using the long tail and your yarn needle. Weave in all ends.
Cheeks 2x (Red)
Start: ch 4
Round 1: sl st around, you have to work 3 sl st on one side and 3 sl st on the opposite side (6) Fasten off, leaving a long tail for sewing.
Sew the cheeks on the body to finish the face using the loose ends and your yarn needle. Weave in ends.

That’s how the face should look like
Tail (White)
For the tail you have to make a really small pompom. I’ve been using the smallest piece of my Prym pompom maker set (Amazon link) but it was still too big so I had to cut it into size and shape afterwards. If you don’t have a pompom maker you can do it with using cardboard or pretty clever with using a fork. Sew the tail to the purse back bottom and weave in ends.

I needed to cut my small pompom to become an even smaller pompom

Cute little bunny tail sewn to the back of the purse
Decoration (White)
Stitch on the decorations to the ears and the belly as seen on the photos using white yarn. Weave in ends.
My pattern is on ravelry, too! I’m happy if you link my pattern in your bunny purse project made by using this pattern. And maybe you would like to share a photo of your crochet bunny purse on my facebook page, too? ♡
